
Exploring traditional and contemporary ceramic surface pattern techniques
Suitable for pupils aged 7 – 16
This step-by-step guide shows how to explore and compare traditional methods of creating surface patterns for ceramics, with contemporary, digital methods. It was inspired by the rapid expansion of pottery companies, such as Wedgewood and Spode, during the Age of Revolution, along with campaigns for social justice and political reform from the period.
The activity was developed by Christ Church Academy working with The Clay Foundation and the Spode Museum. See how Year 8 students explored different surface pattern methods here.
This guide draws on a variety of activities exploring both traditional and contemporary surface pattern processes within ceramics. While digital design and approaches have become a standard method for creating surface patterns, many traditional methods are still used today.
Materials and equipment for making and decorating ceramics can be obtained from a specialist supplier – Christ Church Academy used Potclays in Stoke.
1. Inspiration
Students could keep a sketch book to document their research, ideas and outcomes throughout the project.
Introduce students to the links between ceramics and the Age of Revolution:
- Mass production of goods including ceramics began as a result of the Industrial revolution
- Ceramics played a part in social justice and political campaigns such as the abolition of slavery, when slogans and campaign designs were added to household items such as plates and bowls.
- Pottery companies such as Wedgewood and Spode became household names.
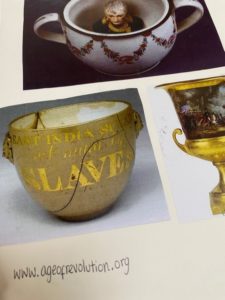
The following pieces from the Revolutionary Collection can be used to support students’ research:
- Chamber pot with Napoleon’s head
- Anti-slavery sugar bowl
- Wedgewood abolitionist plaque
- ‘No Stamp Act’ teapot
Ask students to explore some of the Age of Revolution themes, such as:
Ask them to highlight the issues that they can relate to in some way. From here, they can mind map their thoughts, feelings and any questions prompted by their research.
Ask students to discuss or mind map in groups, their thoughts and ideas on the ceramic surface patterns that they find in the Revolutionary collection. They could consider the following questions:
- What are ceramics?
- What is surface pattern?
- Is there a message or a story within the design?
- How do they think the design has been applied?
- How old do they think the piece is?
Surface pattern techniques
Introduce the students to different traditional surface pattern techniques – such as sgrafitto and copper-plate printing, and contemporary techniques such as designing decals using digital software. Some examples of these can be found in the Powerpoint here.
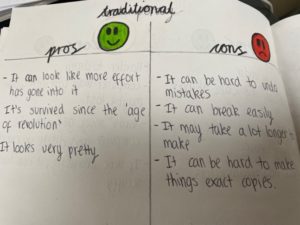
Ask them to research these techniques further and consider the pros and cons of each technique.
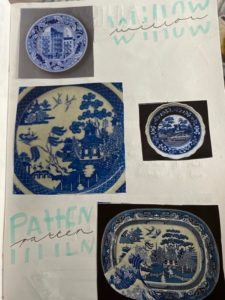
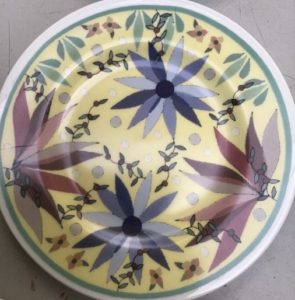
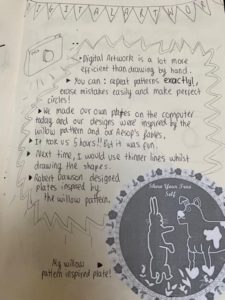
They could look into the willow pattern, for example – an extremely popular Spode design, developed during the Age of Revolution. They could compare this to the work of contemporary ceramicist Paul Scott, whose blue and white Cumbrian blue teaware is made by Spode today, for Fortnum and Mason in London.
If possible, visit a museum – such as the Spode Museum in Stoke- on-Trent.
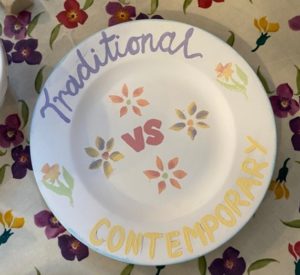
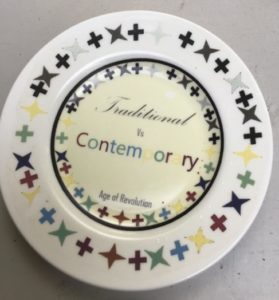
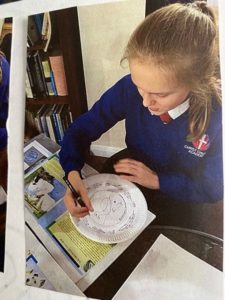
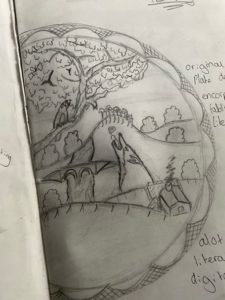
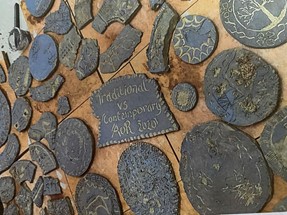
Examples of Year 8 sketchbook research
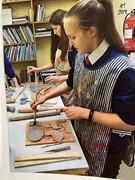
2. Exploring and making
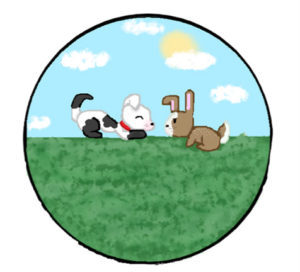
Using their research and mind maps, students can begin to develop illustrative ideas, based on a campaign or issue from the Age of Revolution – or from the current time. They could develop their ideas using illustrative techniques and try creating a central slogan or message.
Students can use paper plates, bowls or cups to explore their ideas for surface designs further.
Surface pattern techniques
Sgraffito (Traditional)
Sgraffito is the process of applying a coloured slip (water and clay mixed with a coloured glaze) over clay and cutting into it to reveal the colour of the clay body beneath.
If these resources are not available, playdoh or salt dough and paint can be used instead.
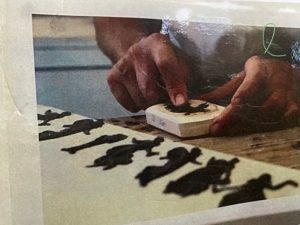
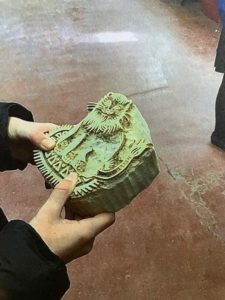
Sprigging (Traditional)
Sprigging is the technique of applying a 3D pattern to the surface of a ceramic using a special mould and clay. Find out more here. Students could experiment using playdoh or salt dough, and cake decorating moulds.

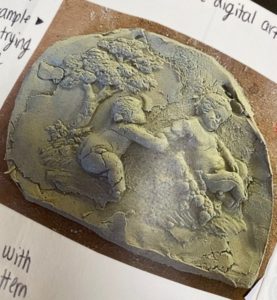
Year 8 Sprigging patterns, created using moulds from The Spode Museum
Sponge printing (Traditional/Contemporary)
Contemporary ceramicist Emma Bridgewater is well known for using sponge printing to create her distinctive surface patterns and could be a focus of inspiration. This video shows how this is done in the factory in Stoke-on-Trent.
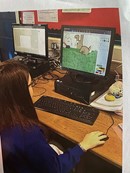
Ask the students to map out basic shapes, lettering or patterns that they wish to print with. Scan or photograph their outcomes and then ask them to experiment with repeated copy and paste to create patterns. This could be done on a simple Paint or Art app, or using Word or Powerpoint.
Students then create sponge blocks in the letters or shapes they have chosen. Upholstery sponge gives the most professional finish, but any firm sponge can be used and experimented with. Older year groups could cut their own sponges using craft scalpels or woodburning pens (if you have access to these); younger students can draw their own shapes to be cut by an adult.
They then use their sponges to create repeating patterns using pottery glazes on to bisque-ware pottery. For best results, wet and squeeze out the sponge, paint the sponge (rather than dipping into the glaze) and print the pattern on to the bisque-ware using a rolling motion.
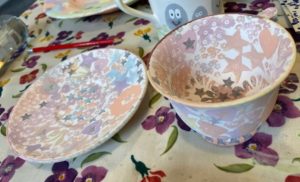
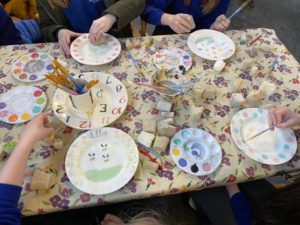
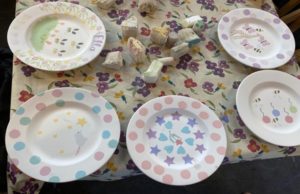
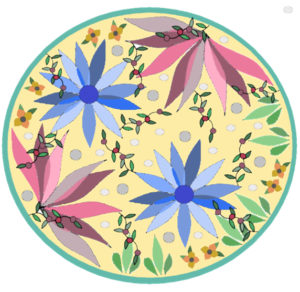
Examples of Year 8 sponge print designs.
Printing at the Spode factory

Sponge printing blocks from the Emma Bridgewater factory
Digital designs and litho decorating (Contemporary)
Students can digitally design their artwork using software such as Photoshop, 3D Paint or ProCreate. They could use the work of contemporary ceramicist Laura Plant – who uses digital design to create her surface patterns – as inspiration for their own designs.
Digital techniques are also used at the Emma Bridgewater factory as explained in this video.
See here for a video demonstration of transfer techniques.

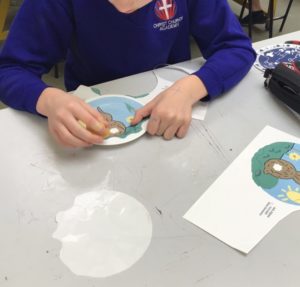
Their designs can then be printed as decals (transfers), through a specialist company such as Fotoceramic which the students can apply to chinaware using water and sponges. Instructions – including a video – for how to do this can be found here, or in the Powerpoint here.
Pre-designed decal transfer sheets are also available to buy online.
If a kiln and other equipment and materials are not available, students could create digital designs as above, and then collage them on to paper bowls, plates or cups and ‘varnish’ them using watered down PVA glue.
3. Evaluating and reflecting
Students could discuss the following:
- What technique/s did you prefer working with? Why?
- Which techniques have stood the test of time and are still successfully used today?
- What are the benefits of working digitally to produce surface designs?
- Are there any negative elements, in your opinion, of working digitally?
Find further ideas and resources from The Clay Foundation here.